Tools
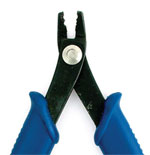 | Crimping pliers are for just what their name implies, crimping! The back slot puts a seam in the middle of the crimp tube, separating the ends of the flex wire and trapping it firmly. The front slot rounds out the tube and turns it into a small, tidy bead. |
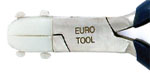
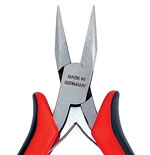 | Chain-nose pliers are the most useful tool in your entire toolbox. For holding, opening and closing jump rings and bending sharp angles. |
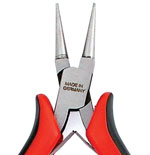 | Round-nose pliers are intended for turning round loops. They do not work well for holding or grasping since they tend to leave a small dent. |
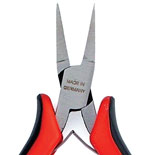 | Flat-nose pliers are a wire power tool. They are excellent for turning sharp corners, holding items and for opening and closing jump rings. |
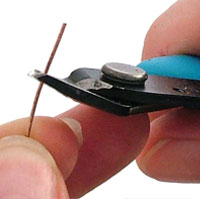
 | Wire flush cutters leave one flat side and one pointed side on each cut. Using flush cutters is especially important when working with heavy gauges of wire (20-gauge or smaller). One side of the cutter is flat and the other is indented. |
 | Nylon-jaw pliers can be used to harden or straighten wire. |
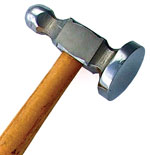 | Jeweler’s hammers have fine, smooth curved heads to leave a clean impression. The round peen side works well for texturing wire and metal sheet. |
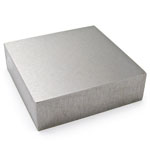 | A bench block is a flat, smooth piece of hardened steel. Hammering on top of a block flattens out and hardens the wire. Bench blocks are also used for stamping metal to get a clean impression. |
Materials
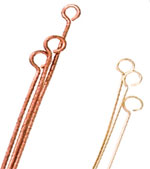 | Eye Pins are wires with a loop on one end and a straight portion of wire where beads can be strung. Length and gauges vary; most earrings use 24-gauge eye pins from 1 1/2 – 2 1/2 inches. |
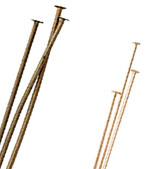 | Head Pins are a piece of wire with a stop end like a fine nail head. A bead slides onto the head pin and stops on the head. Lengths and gauges vary; most earrings use 24-gauge head pins from 1 1/2 – 2 1/2 inches. |
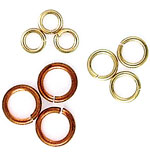 | Jump Rings are one of the most versatile findings used in jewelry-making. They come in all sizes, gauges and metals. They are measured by diameter (width) and gauge (weight). |
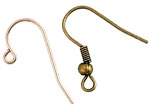 | Ear Wires come in many different styles. Regular fishhook style are the most common and the easiest to make yourself. Recommended weight for ear wires is either 22- or 20-gauge. |
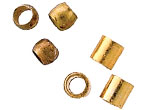 | Crimp Tubes are small soft metal cylinders that can be flattened or formed around flexible beading wire to secure the ends. They are an essential component for bead stringing projects. |
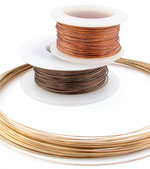 | Wire comes in many sizes or gauges. Gauge is the measured diameter of the wire. The higher the number, the thinner the wire. Wire can be tempered soft, half-hard or hard, which refers to its stiffness. Copper, silver and gold-filled are most commonly used for jewelry. |
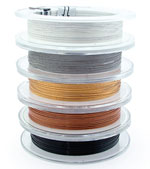 | Flexible Beading Wire comes in several weights from .010 - .026-inch diameter and is designed for stringing. It is available in precious metal and several colors and is made from 7 to 49 strands of steel wire, twisted and encased in a flexible plastic coating. Ends are finished with crimp beads using either crimping or chainnose pliers. |
Basics Step-by-Step
Creating your own beaded jewelry is easy and only takes a few tools. Practice these techniques using less expensive metal findings. Once your finishing techniques are perfected, use real sterling silver or vermeil (real gold plating over sterling silver) to add elegance to your beadwork.
Opening & Closing Jump Rings
| Jump rings are one of the most versatile findings used in jewelry-making. They come in all sizes and gauges. | |
| |
| |
 Use two pairs of smooth chain-nose pliers (bent or flat-nose pliers work fine as a second plier). (Photo A)
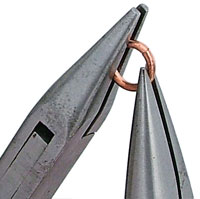 Push ring open with right plier while holding across the ring with left plier. To close, hold in the same way and rock the ring back and forth until ring ends rub against each other or you hear a click. Moving the ring past closed then back hardens the ring and assures a tight closure. (Photo B)
Making and Eye Pin or Round Loop
| Eye pins should be made with half-hard wire to make sure they hold their shape. 22-gauge will fit through most beads, with the exception of many semi-precious stones. Most Czech glass beads and 4mm crystals will fit on 20-gauge wire. |
|
Using chain-nose pliers, make a 90-degree bend 3/8 inch from end of wire. (Photo B) |
Using round-nose pliers, grasp the end of the wire so no wire sticks out between plier blades. (Photo C1) |
Begin making a loop by rolling your hand away from your body. Don’t try to make the entire loop in one movement. Roll your hand 1/4 turn counterclockwise. (Photo C2) |
Without removing pliers from loop, open plier blade slightly and pivot plier back toward your body clockwise about 1/4 turn. (Photo D) |
Close plier onto the wire and roll the loop until it comes around, next to the 90-degree bend. (Photo E) |
Open and close eye-pin loops the same way as jump rings, by pushing open front to back. (Photo F) |
 The length used for the eye loop depends on how big you want the loop. Here we will use 3/8 inch for a moderate size loop. Flush trim end of wire. (Photo A)
Making Wire-Wrapped Loops
|
Make a 90-degree bend about 1 1/2 inches from end of the wire using chain-nose pliers. (Photo B) |
Using round-nose pliers, grab wire about 3/8 inch away from the 90-degree and roll your hand away from yourself, toward the bend until a loop is halfway formed. (Photos C1 and C2) |
Without removing plier from forming loop, open the jaw and rotate plier clockwise about 1/4 turn. (Photo D) |
Grab the end of the wire with your left (nondominant) hand and pull it around the rest of the way until it crosses itself and completes the loop. (Photo E) |
Switch to chain-nose pliers, holding across the loop. Wrap tail around wire under loop with your left hand. If you are using a heavy gauge of wire, it is often easier to use a second plier to pull the tail around instead of your fingers. (Photos F1 and F2) |
Flush cut wire as close to the wrap as possible. Tuck end down if needed, using chain-nose pliers. (Photos G1 and G2) |
To create a wrap on the opposite end of the bead, leave a gap equal to wrap space on first end. Grasp to the right of the wrap space and make a 90-degree bend. (Photos H1 and H2) |
Repeat from Photo C–H to complete. |
 Practice wire wrapping with either 22- or 24-gauge wire. Harden slightly by pulling on one end with the other end clamped in a vise or pull one or two times through nylon-jaw pliers. (Photo A)
Hammering Wire
Hammering hardens and flattens round wire. This can be especially important when making ear wires or clasps that need to hold their shape. Always use a smooth, hardened steel surface to guarantee a clean finish. Any marks or scars on a bench block or hammer will impress on the surface of wire or sheet metal. |
|
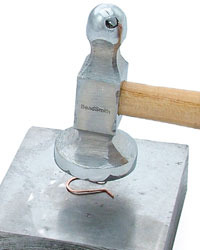 Create your shape from wire. Keep hammer flat to prevent marring wire. Flip over after a few taps and hammer on opposite side. Don’t get carried away, if you hammer too much metal becomes brittle and breaks. (Photo A)
Crimping
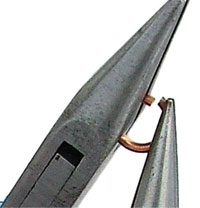
String a crimp bead onto flexible wire. String clasp or ring and pass tail of flexible wire back through crimp to form a loop. |
|
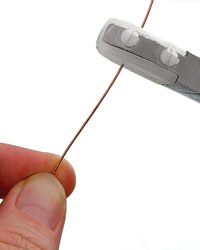
Put oval into back slot of plier and squeeze to make fold in the center with one wire on each side of fold. (Photo B) |
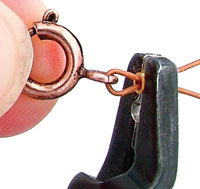
Return to front slot, and squeeze again to tighten crimp. Do a few more rotations and squeezes to solidify and shape crimp bead. Trim wire tail. (Photo C) |
 Hold wires parallel and make sure crimp is positioned correctly. Using front slot on plier, shape crimp into a small oval. (Photo A)
Thanks for visiting biconebeads.blogspot.com. Keep visiting us for latest update about bicone beads.

No comments:
Post a Comment